Now we are trudging into the teeth of Winter, I always find it helpful to focus on positives. I will admit that I find it difficult to get used to leaving for work and coming home in the dark, but one of the things I can look forward to is it is becoming chilly enough to get back into cold smoking. There is something almost alchemic about turning a slab of raw salmon into a delicious, smoky, oily, treat to be had with scrambled eggs, on a crispbread, as part of a smorgasbord or late at night in front of the fridge when you think no one is looking. One of the joys of making your own is that it is a pretty straightforward process. Yes, it takes a few days from start to finish, but most of that time is taken up by waiting for things to happen rather than direct involvement from the chef. If you read this and think “by Jove I’m going to have a go at that” then I will add the smallest of caveats. Curing raw ingredients does require pretty scrupulous hygiene and the finished cold-smoked product is technically not cooked. I did a lot of reading before doing my first salmon and the information I found on keeping your food safe to eat ranged from “YOU MIGHT ACTUALLY DIE IF YOU GET THIS WRONG” to a much more laissez-faire “what’s the worst that can happen man?” kind of vibe. From my point of view, if you keep your work surfaces, utensils, and knife clean you will not go far wrong.
The Smoker
I built my smoker a few years ago out of plywood, using cheap supermarket cake cooling racks for the shelves. I don’t have much of a workshop, but I sketched out my plan, worked out some measurements based on the size of the racks and took these to my local DIY shop who cut out the plywood panels for me. I then just glued and screwed everything together and used 4 clips to hold the front door on. I drilled 2 big holes in the door to let air in at the bottom and smoke out of the top. The 4 shelves sit on wooden rails and each shelf has space for 2 sides of salmon. Now I’ve used it a load of times, it has a beautiful smoky aroma about it which is lovely. If you have any kind of barbecue with a lid, you can use this instead, as long as it has vents where you can control the flow of air.
The Smoke
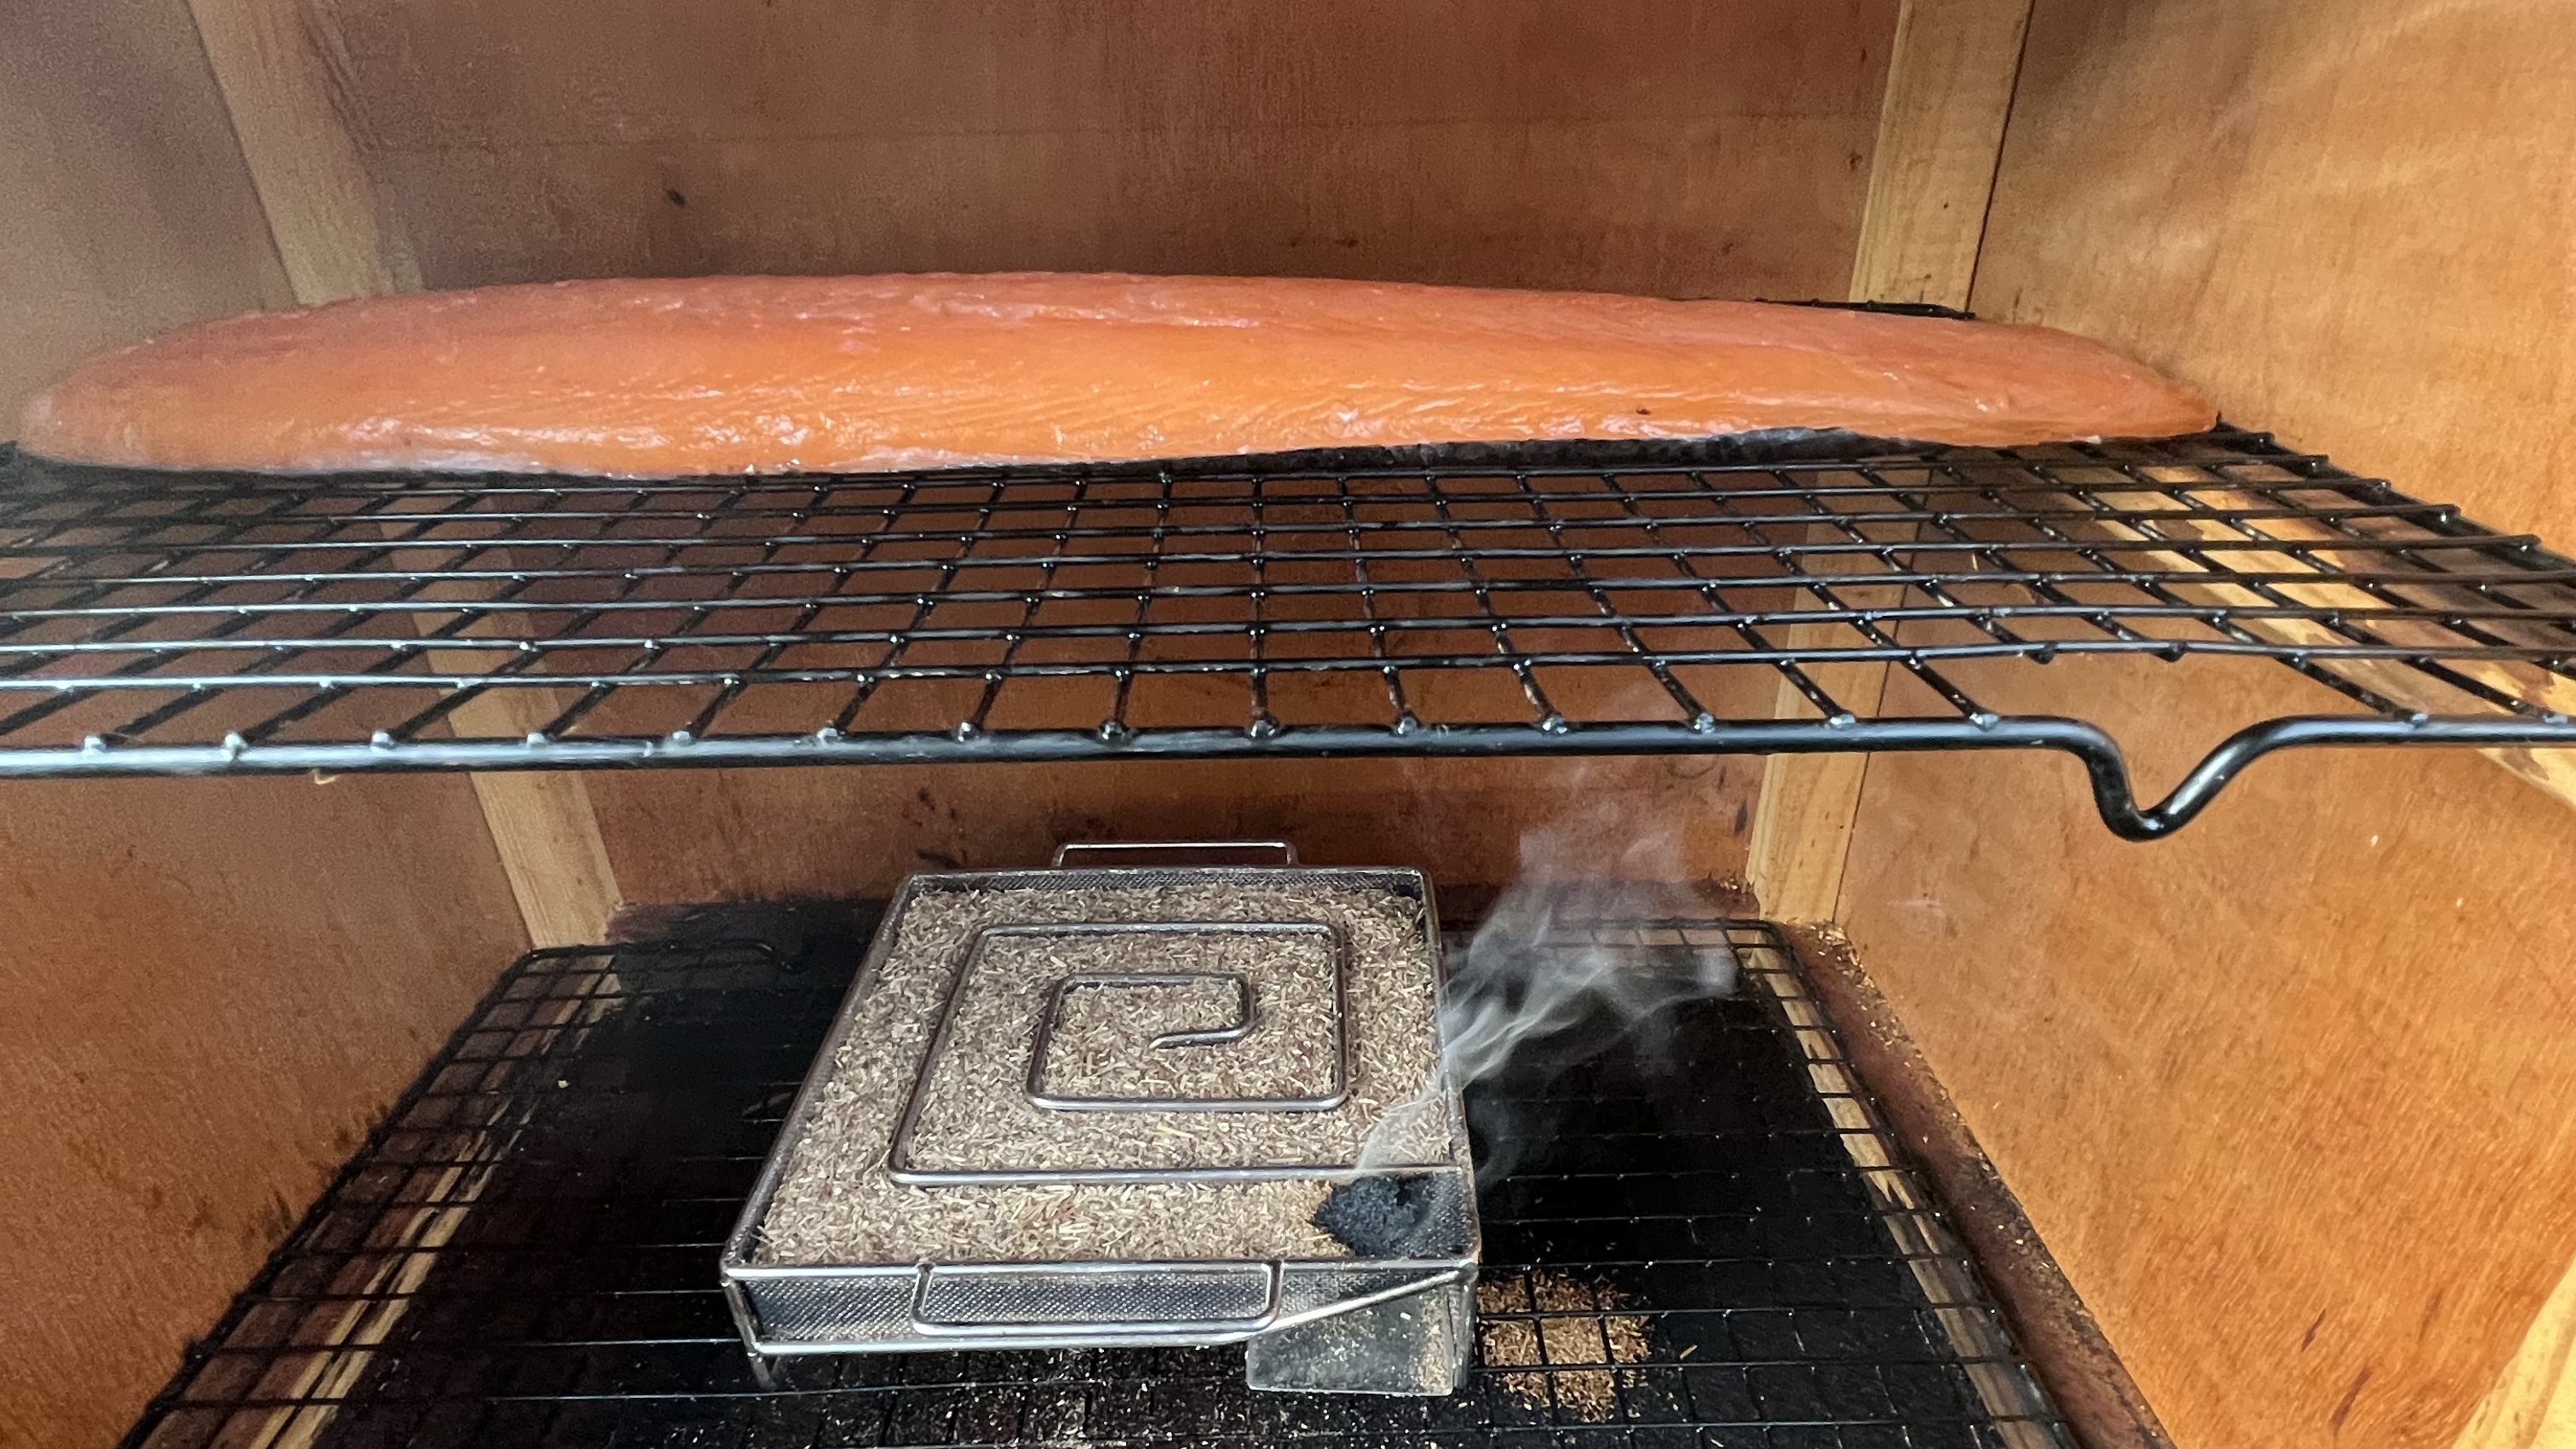
The smoke needs to impart flavour to the fish, but not be hot enough to cook it. There are number of cold-smoke generators on the market, but the one I have is from Pro-Q. It is square in shape and is what is called a “maze” design where basically, you fill it up with sawdust and set fire to one end and, because the wood particles are very small, they smolder giving off lots of smoke without ever getting hot enough to catch fire. Clever. A full load of smoking dust will last about 10 hours which is perfect for salmon.
The Salmon
Now salmon is traditionally seen as a luxurious ingredient and there is no doubt that line caught ones from Scottish rivers will set you back a few quid. I only make this recipe when we see whole sides of farmed fish on sale in the supermarket. Farmed salmon is a bit flabbier than wild, but for the process of curing and smoking, it turns out that this is a pretty desirable trait in your fish. Depending on where you get your salmon from, you might be able to get your fishmonger to prep it for you. If not, the only thing you really need to do is, with a sharp knife, remove the belly portion to make the finished product a more even shape. Save all the bits because salmon belly makes delicious fishcakes. You can remove any pin bones at this point, but by happy accident, I have discovered that they are easier to find and remove once you have cured the fish. I never bother removing the scales but I guess you could if you wanted to.
The Cure
This is stage which really does determine how the finished product comes out. Curing is a pretty ancient technique for preserving foods using salt. The salt draws moisture from the fish and prolongs its shelf life. There are loads of online sites that sell salmon curing kits (and Pro-Q do a starter pack that comes with the smoke generator) but it is a matter of moments to make your own and it is very satisfying to do so. The curing mixture I use is simply a 50:50 mixture of salt and unrefined castor sugar. One side of salmon needs about 100-150g of the cure depending on how big it is, but I tend to make more and store the leftovers in a Kilner jar in the pantry. We have those digital scales with the tare function, so I just plonk my jar on them, set it to zero, weigh 100g of salt, set it to zero again and weigh out the sugar. The jar needs a good shake to make sure everything is evenly mixed.
The process
Timing is important, so you need to work backwards from the time you want to eat your smoked salmon. If you want a beautiful Sunday brunch with toast and scrambled eggs, you need to start on Wednesday morning. There are 5 stages:
- Curing the salmon.
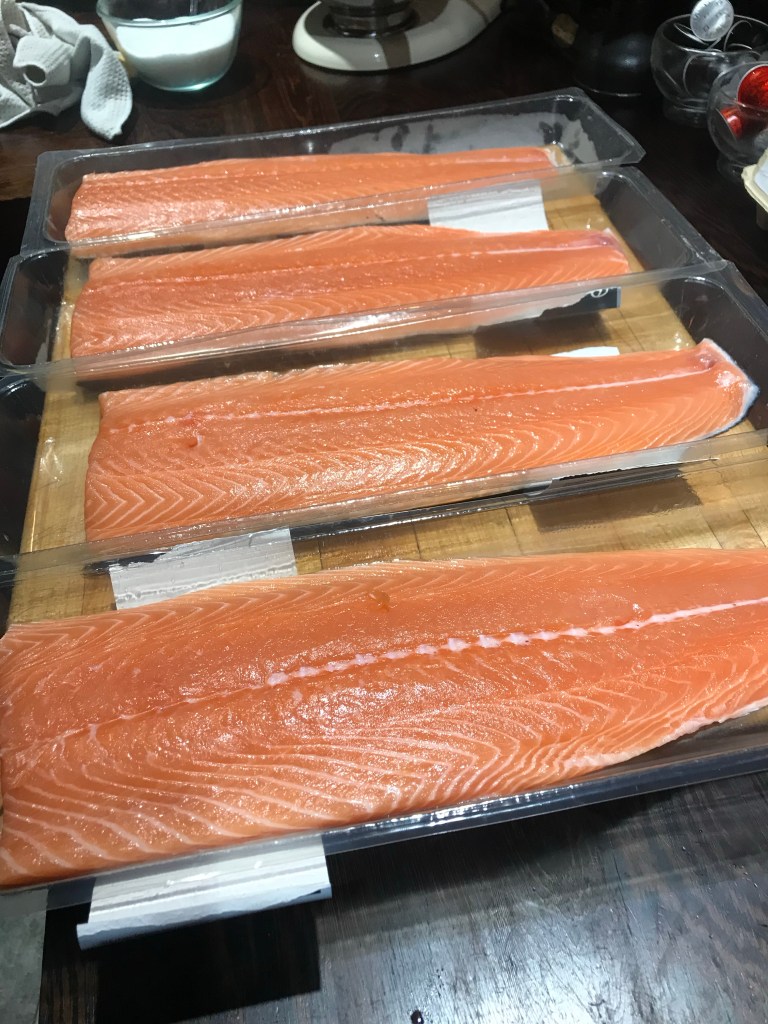
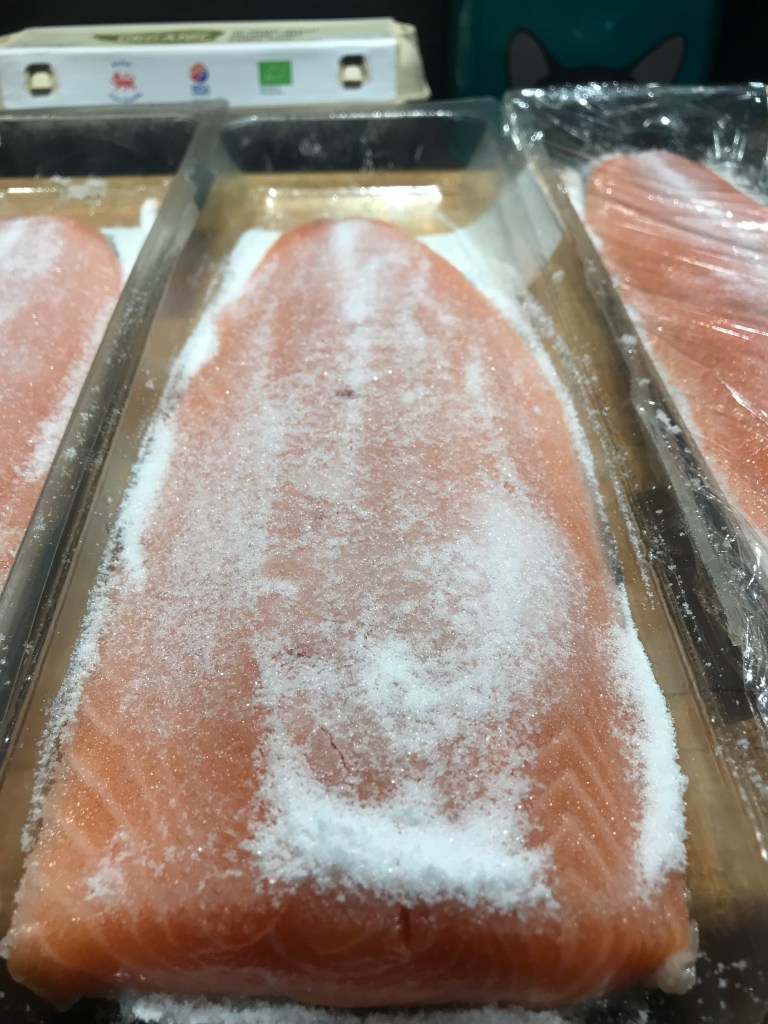
The salmon I tend to get comes in its own plastic tray, which is a very handy vessel to cure it in. If your salmon doesn’t come this way, you need a non-metal dish that will fit your fish. If you only have a metal tray, then line it with a few layers of cling film. Once you have trimmed the belly piece off, lay the fish nice and flat and dry the flesh off with some kitchen paper. Now sprinkle over the cure until you have got the whole thing covered, making sure you get all the edges as well. Aim to put less on the thinner tail end, or it can get a bit tough and hold a saltier taste when it is finished. You can cure your salmon for anywhere between 12 and 36 hours, depending on how you want it to turn out. The longer you leave it, the more moisture is drawn out and the firmer the flesh will be. I tend to go for about 18-20 hours which seems to give pretty consistent results. What you end up with at this point is basically a kind of Gravadlax but without the dill and you can slice it up and eat it at this point if you wish. If you didn’t remove the pin bones before, now is the time to do it.
- Forming the “pellicle”
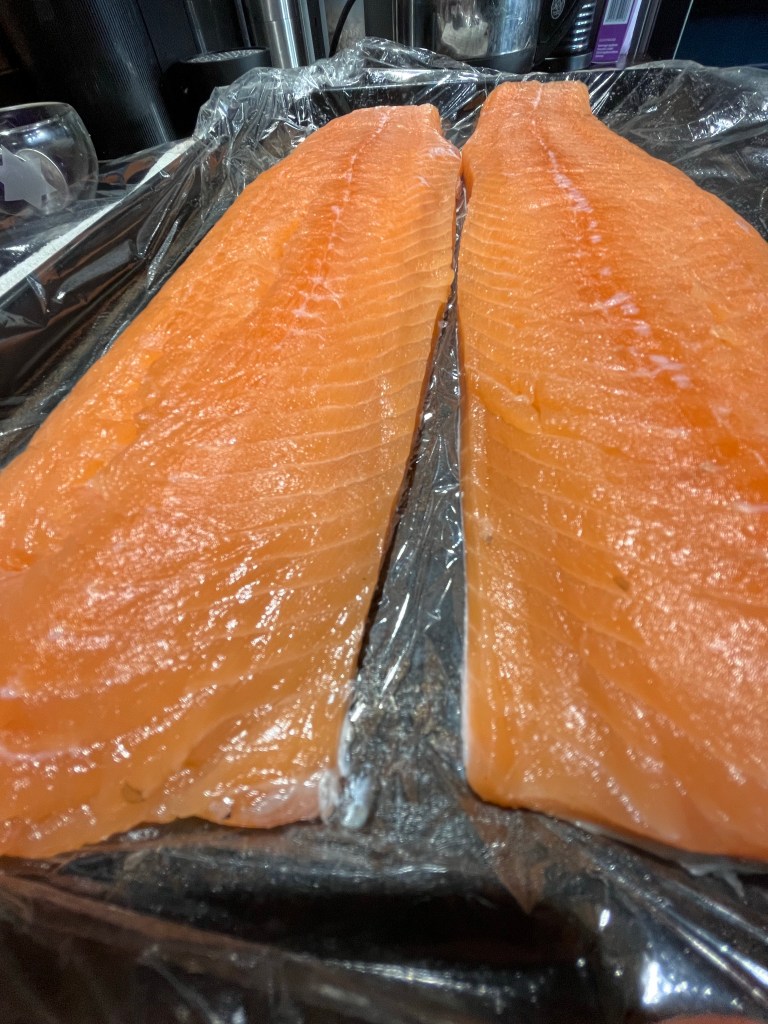
The pellicle is a layer of proteins on the outside of the flesh and it is to this that the smoke sticks and imparts its flavour. Luckily, to create your pellicle, all you need to do is leave your cured fish in the fridge, uncovered, for about 24 hours. Once the cure has done its job, pour all the liquid in your tray down the sink and then carefully wash your fillets under cold running water to remove any remaining cure. Now, taking a good few sheets of kitchen paper, get the fillet as dry as you can. Put it on a rack over a tray, then put it in your fridge and leave it until the next day. Don’t cover it with anything and make sure that nothing else in the fridge can drip on to it.
- Smoking
The next day, check your fish by lightly tapping it – there should be a kind of chilly tackiness to the flesh. Now you can turn your attention to your smoker. Load your sawdust (I tend to use oak as it smells and tastes lovely, but maple is also excellent) and set it smoldering. Now transfer your fish to your smoker, place your cold smoke generator in the bottom and shut the door. Now all you have to do is leave it until the smoke runs out. It couldn’t be easier. You now have smoked salmon!
- The patient waiting
Now, you can slice some strips and find a handy bagel with cream cheese and get it down your cakehole straight away, but I have found it makes a difference if you wait you wrap your salmon in cling or vac-pack it for a day or so, it allows the fish to rest a bit and the smoke seems to penetrate more evenly. We bought a pretty cheap vac-packer on Amazon for about £35 and it works really well. I use it for lots of other things, so I do recommend getting one if you get the cold smoking bug.
- The eating
There are 2 traditional ways to slice your salmon. The first is the thin, almost translucent lateral cut which is usually what you get when you buy smoked salmon from a supermarket. For this you do need a relatively long, thin knife as sharp as you can get it. For a right handed person, put the head end of the salmon to the left and cut from head to tail starting the first slice about two thirds of the way along. Make a shallow cut and move your knife as smoothly as you can; ideally you will slice so thinly you can see the blade through the flesh. If you don’t have the patience, or the right kind of knife, you can go for D cuts where you cut vertically downwards to the skin and then slide your knife along the skin to release all the bits you have just cut. These give more meaty morsels and do work very well with the aforementioned bagel and cream cheese or Eggs Royale.
Not only is the process of making your own smoked salmon fun and extremely satisfying, it is also pretty cost effective. Supermarket smoked salmon tends to be priced at between £6-£9 for 100g so it does carry a fairly premium price tag. I wait until I see a good deal and usually pay about £10 or £12 for a whole side which would usually weigh about a kilo and yield somewhere between 800-850g. Smoked salmon freezes brilliantly so if you can get a few sides in one go you can have some in your freezer over the summer months.
There are a few startup costs, but I’ve had my Pro-Q smoke generator for probably about 5 years and made 80 to 90 whole sides in that time – it’s a robust piece of kit and looks like it will last. The smoker I made cost about £20 in plywood, and I had the glue and screws knocking around in the shed. The cake racks were £2.50 each I think. Since I made the smoker, I have added handles onto the sides to make it a bit easier to carry round. If you fancy giving it a go to make your own, send me a message and I’ll point you in the right direction by sending you the measurements.
Alternatively, look up the splendidly alliteratively monikered Turan T Turan who can show you how to use a big cardboard box as your smoker.
Good luck! Have fun!
